Managing Your Knowledge Source
Learn how to upload and manage different types of data sources for your ChatNexus chatbot
Your chatbot's effectiveness depends heavily on the quality and organization of its knowledge base. This guide covers how to upload, configure, and manage different types of data sources to enhance your chatbot's capabilities.
Accessing Data Source Settings
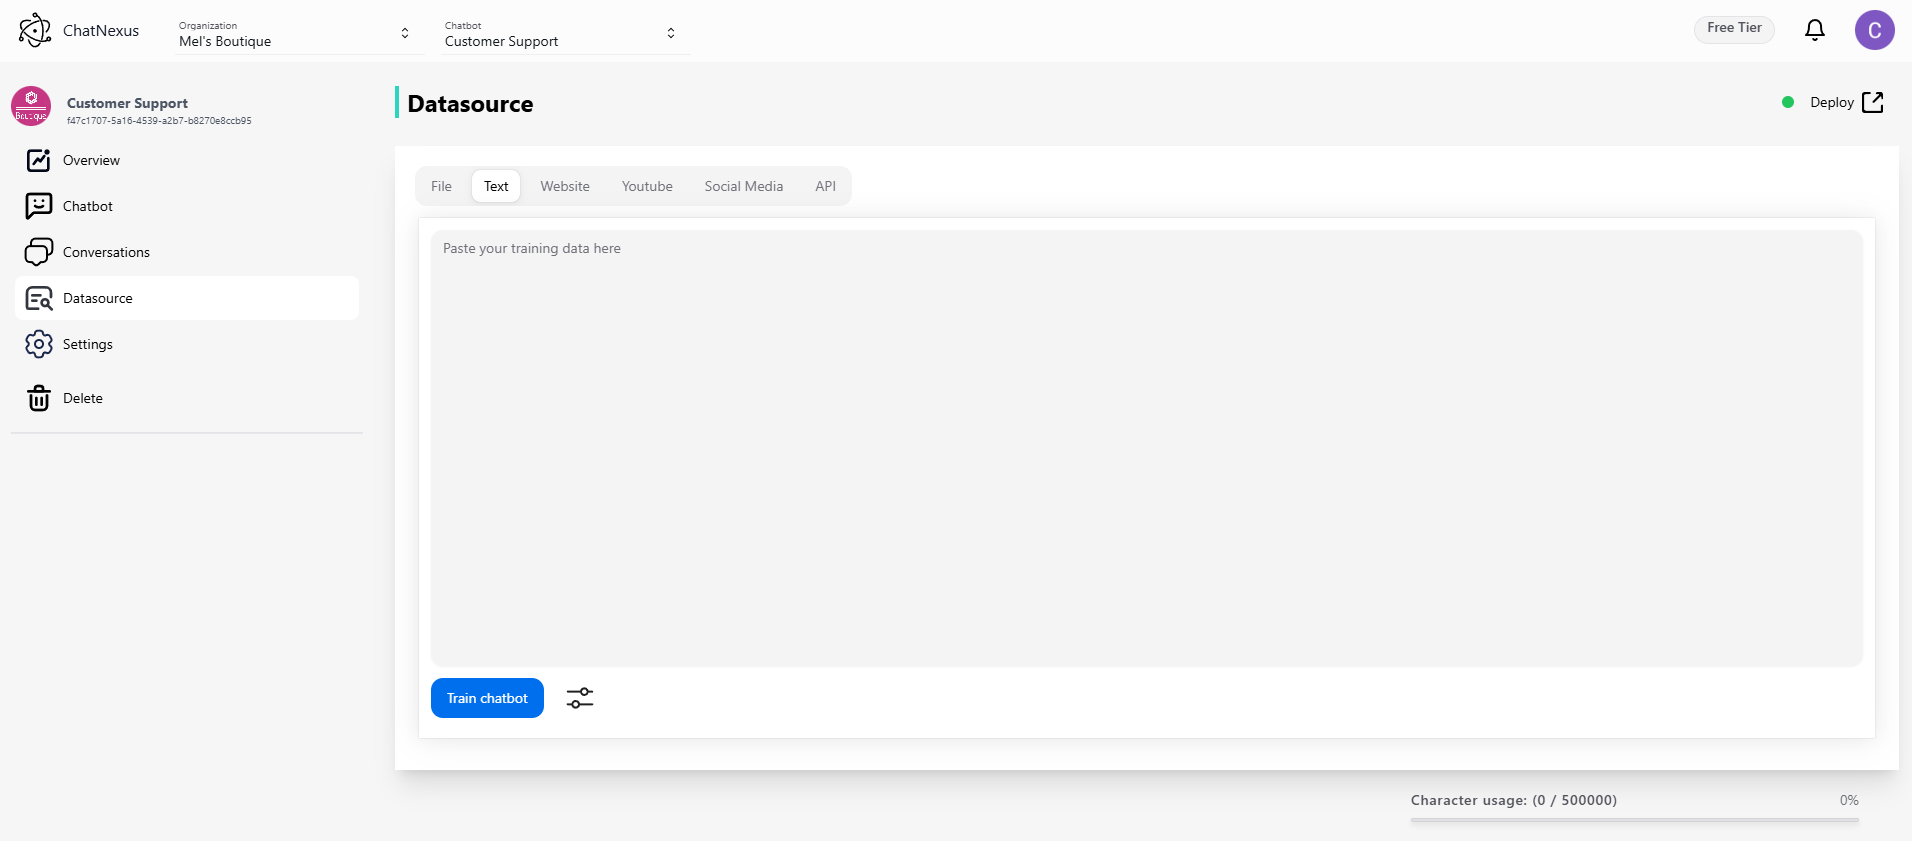
- Navigate to the Configuration section in your dashboard
- Select "Datasource Settings" from the menu
- You'll see the data source management interface with various upload options
Supported Data Sources
File Upload
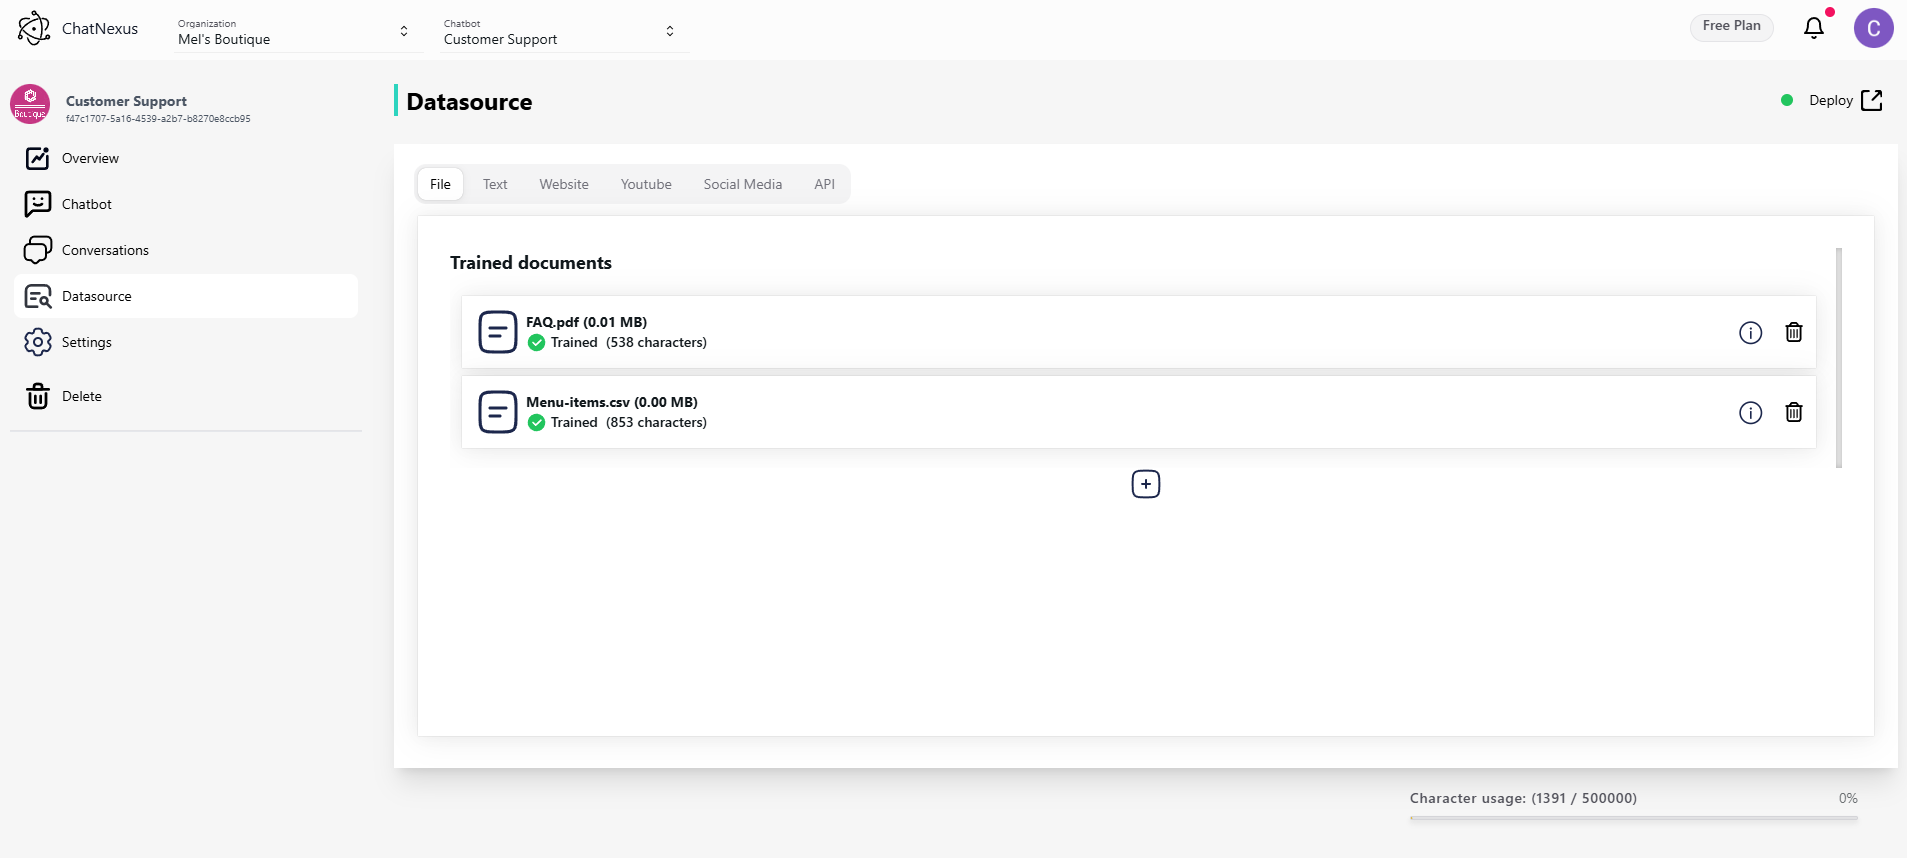
Supported Formats
- PDF Documents (*.pdf)
- Microsoft Word (*.doc, *.docx)
- Text Files (*.txt)
- Markdown (*.md)
- CSV/Excel Files (*.csv, *.xlsx)
- JSON Documents (*.json)
- HTML Files (*.html)
Best Practices for File Upload
- Ensure files are properly formatted
- Remove any unnecessary formatting
- Keep file sizes under recommended limits
- Use descriptive file names
- Organize documents by topic or category
Website Links
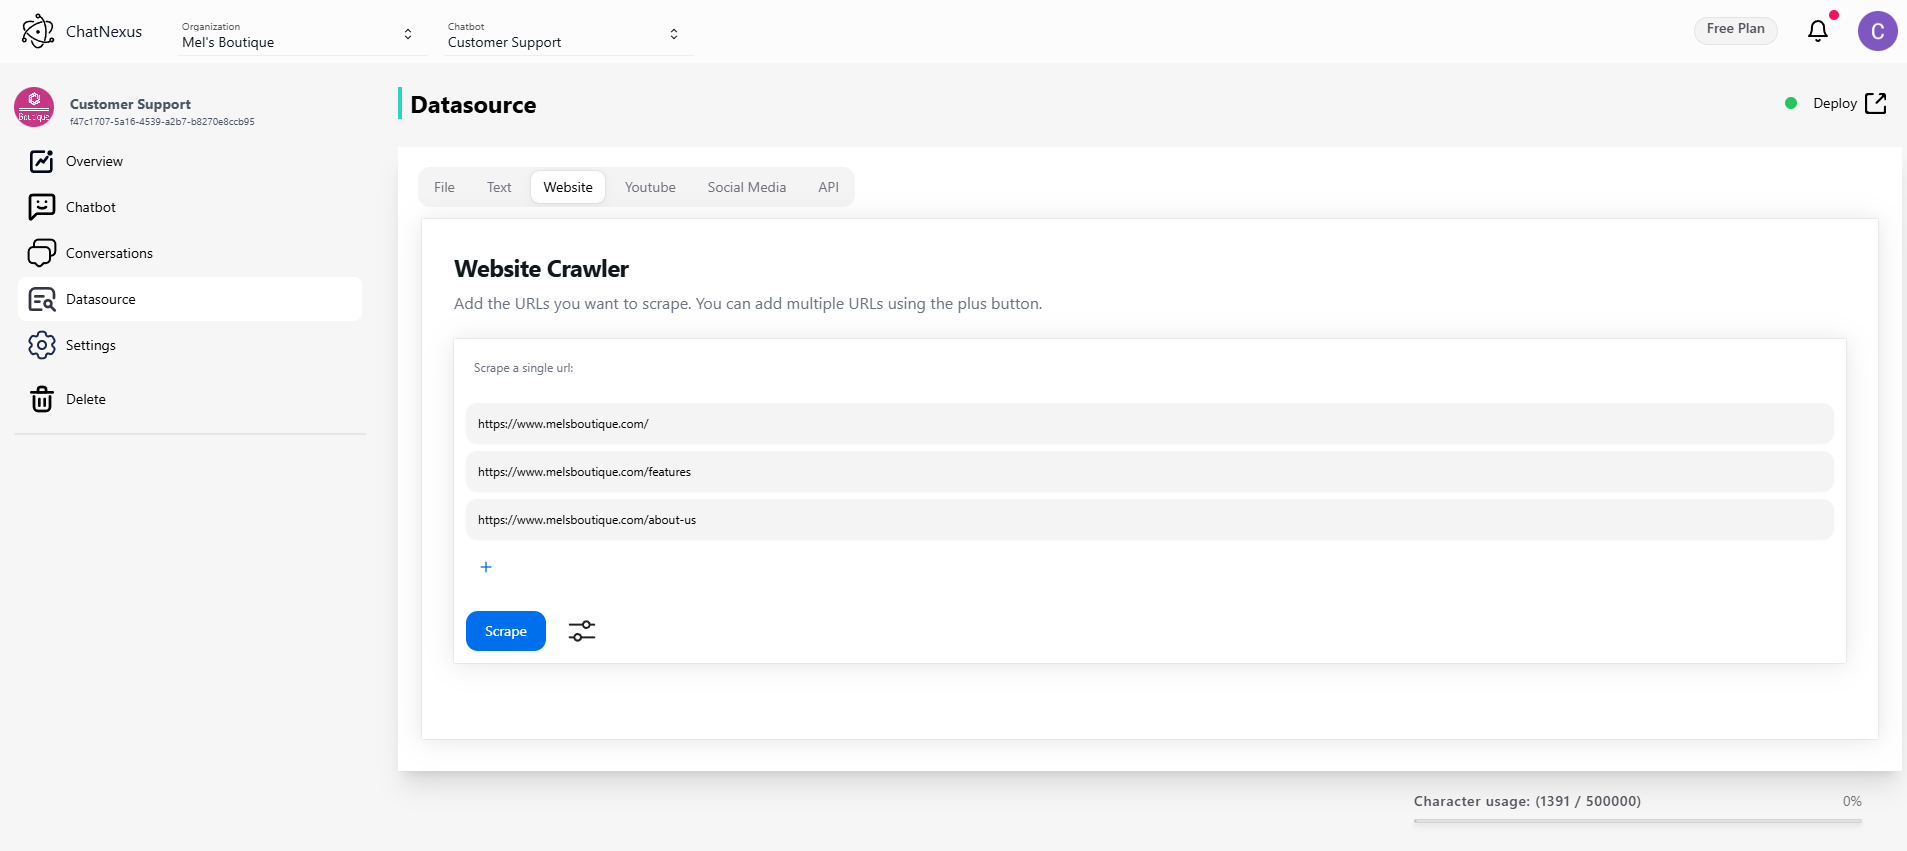
Add knowledge from web pages:
- Enter complete URLs
- Support for both single pages and entire domains
- Automatic content extraction and cleaning
- Handles dynamic content
- Respects robots.txt and site policies
Tips for Website Import
- Verify URL accessibility
- Check content relevance
- Consider update frequency
- Monitor crawling depth
- Respect website terms of service
YouTube Links
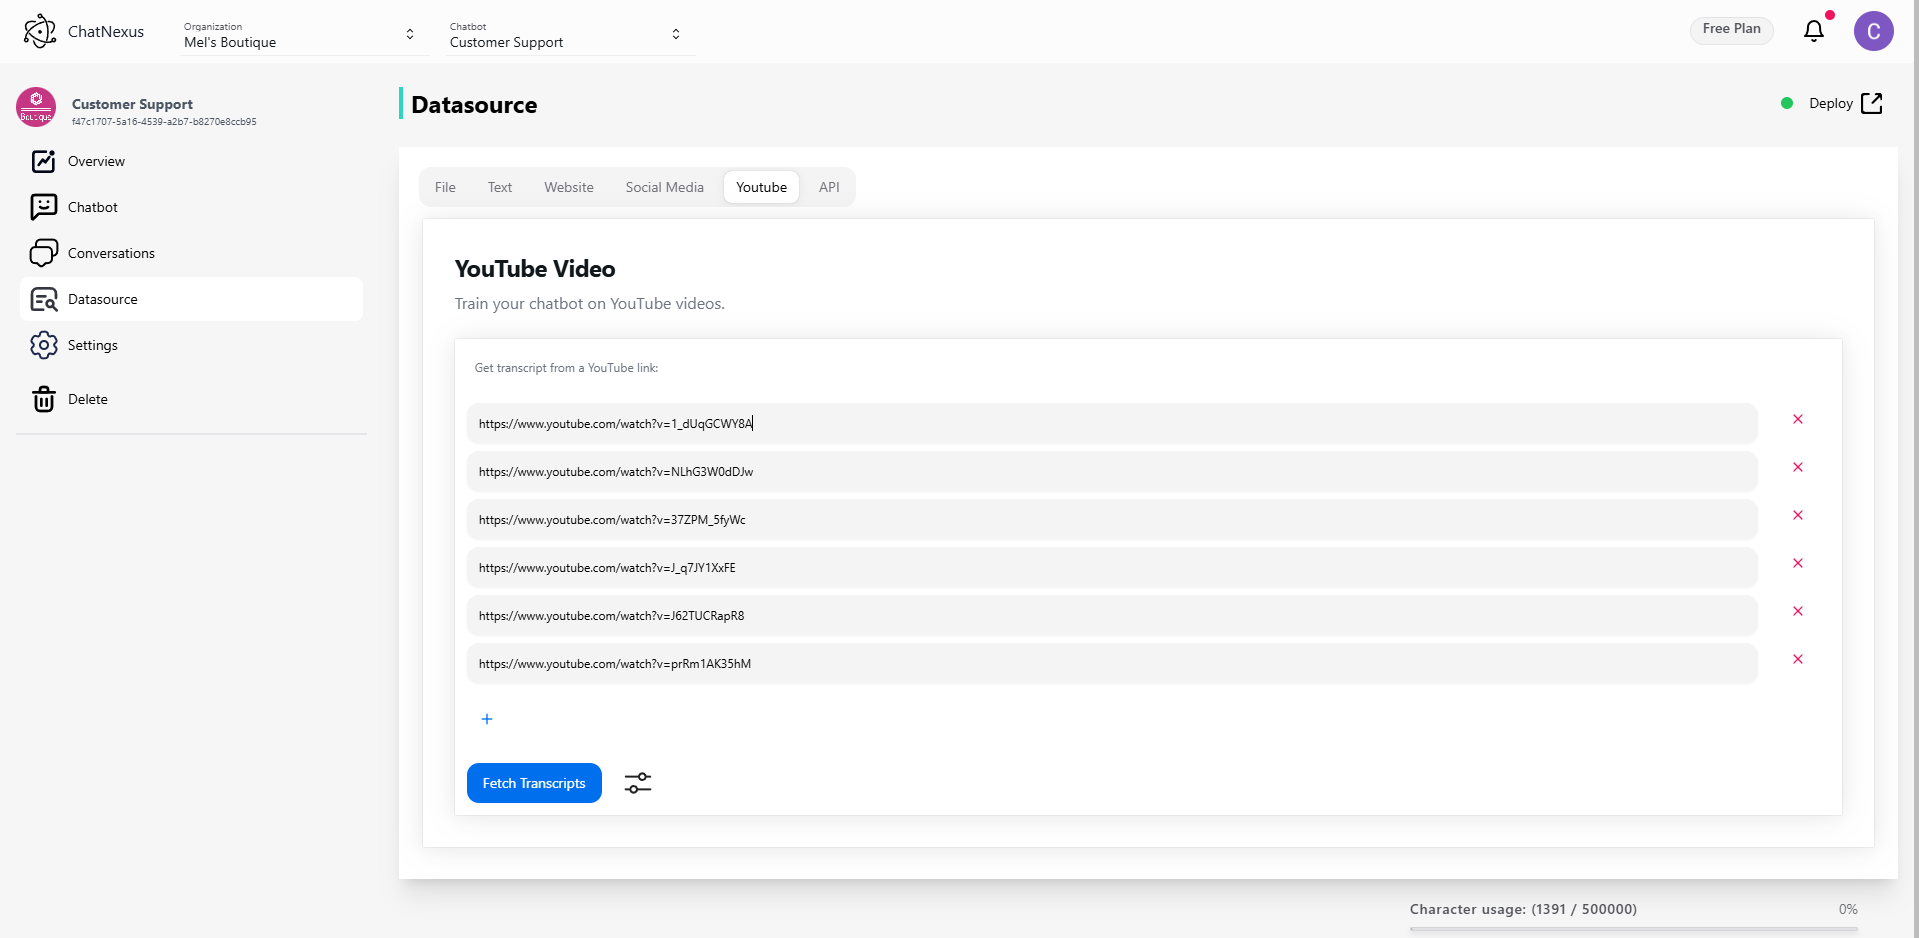
Import knowledge from video content:
- Automatic transcript extraction
- Support for timestamps
- Handles video descriptions
- Processes closed captions
- Multiple language support
Optimizing YouTube Imports
- Use high-quality videos
- Verify transcript accuracy
- Consider video length
- Check caption availability
- Select relevant segments
Plain Text Input
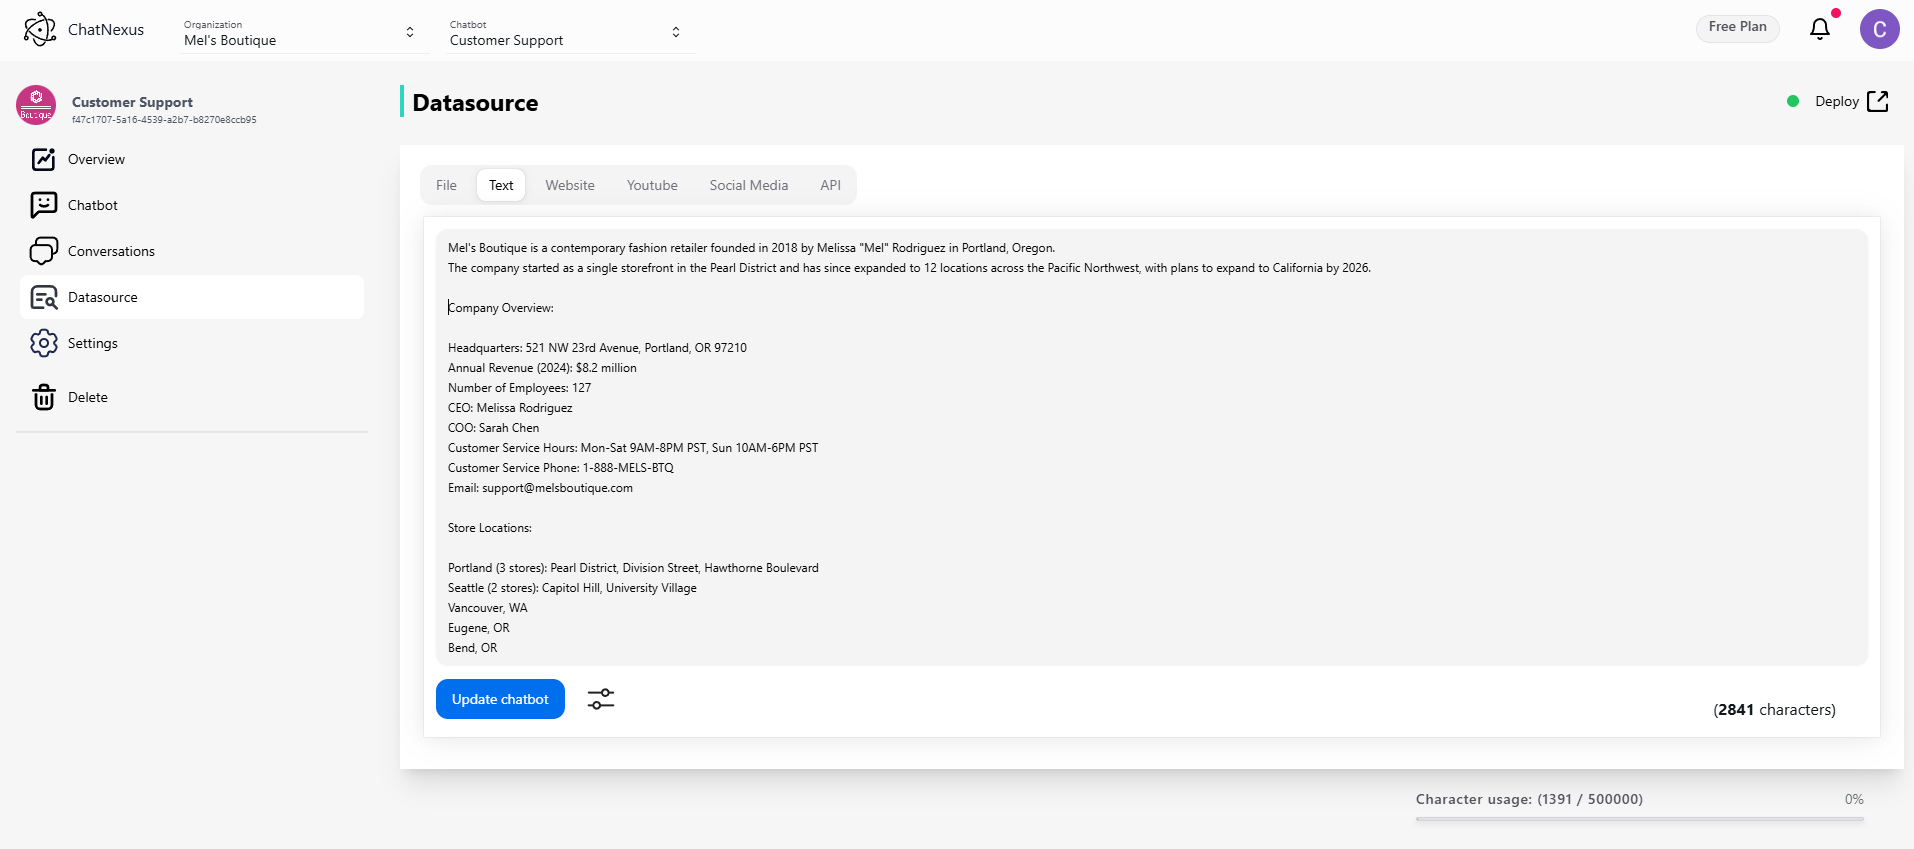
Direct text entry for:
- Quick knowledge additions
- Custom instructions
- Specific rules or guidelines
- Immediate updates
- Testing and validation
Integrations (Pro Plan)
Connect your favorite cloud tools to import content directly into your chatbot's knowledge base.
Note:
Cloud integrations are available on Pro plans. Each integration uses OAuth for secure access — your credentials are never stored.
Google (Docs, Sheets & Drive)
Import content from your Google Workspace:
- Google Docs — full document text extraction with formatting
- Google Sheets — row-by-row data import with column headers
- Google Drive — browse and import supported file types
Setup
- Click Connect on the Google integration card
- Sign in with your Google account and grant read-only access
- Browse your files and select what to import
- Content is automatically extracted, chunked, and vectorized
Supported File Types
- Google Docs (native)
- Google Sheets (native)
- PDF, DOCX, TXT files stored in Drive
Notion (Pages & Databases)
Import your Notion workspace content:
- Pages — full page content including nested blocks
- Databases — structured data from database rows with properties
Setup
- Click Connect on the Notion integration card
- Authorize ChatNexus in Notion and select which pages to share
- Browse your pages and databases in tree or flat view
- Select items to import — content is extracted and vectorized
Tips
- Share specific pages or entire workspaces with the integration
- Database imports include all property fields as metadata
- Nested page content (toggles, callouts, code blocks) is fully extracted
Confluence (Spaces & Pages)
Import documentation from Atlassian Confluence:
- Pages — full page content with HTML-to-text conversion
- Spaces — browse pages organized by Confluence space
- Search — find specific pages using CQL (Confluence Query Language)
Setup
- Click Connect on the Confluence integration card
- Authorize via Atlassian OAuth and select your Confluence site
- Browse recent pages or search for specific content
- Import pages — HTML is automatically converted to clean text
Dropbox (Files & Documents)
Import files directly from your Dropbox account:
- File Browser — navigate folders and select files
- Search — find files across your entire Dropbox
- Supported Formats — PDF, DOCX, TXT, MD, CSV, HTML, JSON, XML
Setup
- Click Connect on the Dropbox integration card
- Sign in with your Dropbox account
- Browse folders or search for files
- Select files to import — text is extracted and vectorized
Notes
- Binary formats (PDF, DOCX) use Dropbox's export API for text extraction
- For best results with complex PDFs, consider downloading and uploading via the Files tab
- Token is automatically revoked when you disconnect
Advanced Configuration
Chunk Settings
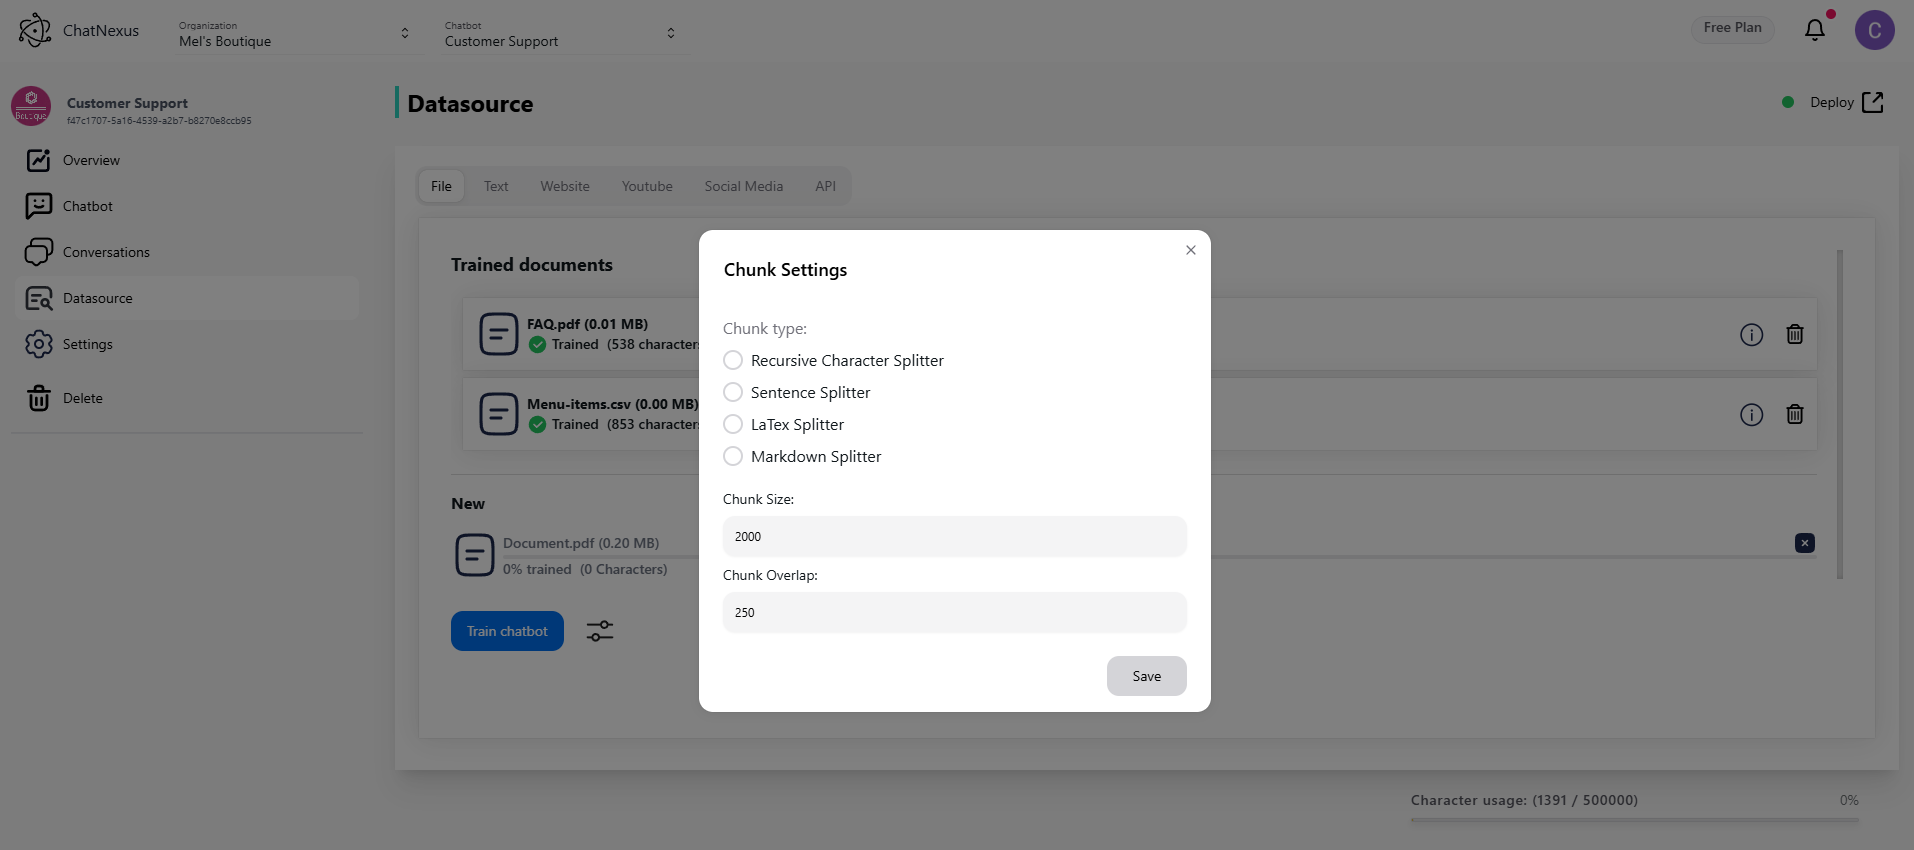
Control how your content is processed:
Chunk Size
- Default: 1000 characters
- Recommended range: 500-2000 characters
- Factors to consider:
- Content complexity
- Response detail needed
- Processing efficiency
- Token limits
Text Splitter Options
- Recursive Character Text Splitter
- Best for general purpose use
- Maintains context across splits
- Configurable overlap
- Preserves semantic meaning
- Token Text Splitter
- Optimal for API token limits
- Precise control over chunk sizes
- Efficient processing
- Ideal for technical content
- Markdown Text Splitter
- Preserves markdown structure
- Maintains formatting
- Respects document hierarchy
- Better for documentation
- HTML Text Splitter
- Preserves HTML structure
- Handles web content
- Maintains tag hierarchy
- Better for web pages
Monitor these metrics in your dashboard to ensure optimal performance.