Start here
Set up a ChatNexus website assistant, add trusted knowledge, configure its experience and publish it on your site.
ChatNexus helps your website answer questions, collect enquiries and guide visitors to a useful next step. This short path gets your first assistant ready to try.
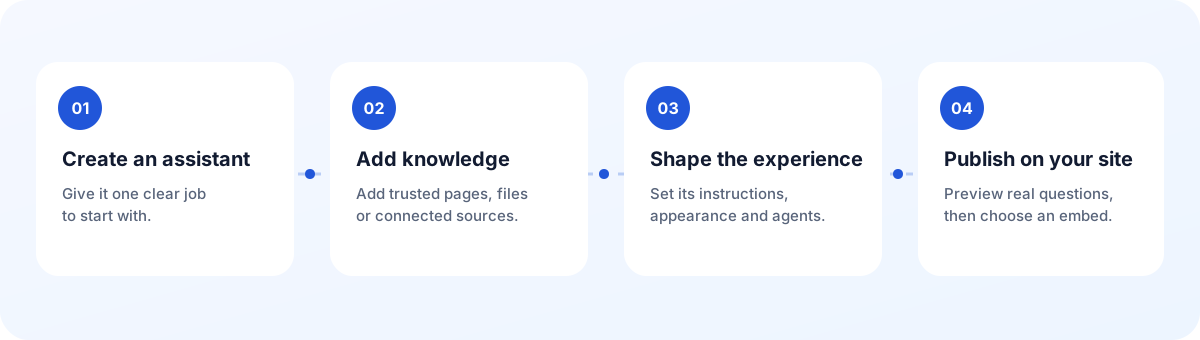
A quick map of the setup. Dashboard labels are shown for guidance; this is an illustration, not a product screenshot.
Get your assistant ready
1. Create an account and assistant
Sign in to the ChatNexus dashboard, choose your workspace, and create an assistant for one clear job. For a first version, pick a real visitor need such as answering product questions, capturing a lead, or helping someone book.
2. Add information it can use
Open Knowledge Base in the chatbot sidebar. Start with a few accurate, public-facing files or pages. You can add files, paste text, crawl selected website pages, connect supported workspaces, or configure an API or database source where your plan allows it.
See Add knowledge to your assistant for source options and practical guidance.
3. Set the experience and its job
Use Settings to set the assistant’s identity, instructions, model, voice, appearance, and other chat behavior. Use Agents to add focused jobs such as appointment booking, lead capture, support, messaging, or a follow-up workflow.
4. Preview, then publish
Try real visitor questions in Live View. Check that the answer is useful, grounded in the information you added, and clear about what the visitor can do next. When it is ready, open Developers → Deploy and choose the website widget, a custom launcher, or an inline chat.
Choose the next guide
Knowledge
Choose files, text, website pages, workspace integrations, an API, or a database source.
Actions
Explore bookings, support, messaging channels, forms, and follow-up workflows.
Experience
Tune its instructions, model, appearance, voice, and conversation starters.
Publish
Copy the website widget, connect your own button, or embed chat inline.
Start with a focused first version:
Add only information you are comfortable sharing with website visitors. Test questions that customers really ask, then expand the assistant’s knowledge and actions as you learn what they need.